Busy Light for Home Office

In this post #
The world changed overnight and suddenly working from home became the norm and the new reality.
For some it might have been an easy change or no change at all. But I think for most of us it had its challenges. Especially if WFH find you against your will.
The office as safe space of work vanished and as work moved to our homes, makeshift desks got cramped into bedroom corners and spare rooms and documents soon occupied kitchen tables. Most of our social interactions are happening on virtual meeting rooms and on the positive side we all became more personal and maybe more open about ourselves in work settings.
But still work and personal life should have its boundaries.
We all have busy days with back to back meetings and presentations and nailing these are more important than ever to gain some visibility when you’re working for a large company.
You don’t want these crucial moments to be ruined by unaware family members showing up in the background of your camera, and since you can’t really share your calendar with your 4 year old, what can you do to let know those around you that you’re in a middle of something and wish not to be disturbed?
Make a busy light.
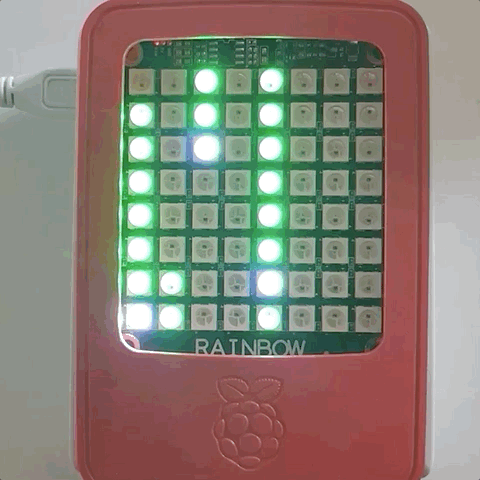
A busy light is some sort of light source that indicates a status.
If you like to tinker with RaspberryPI, like me, or with any other Arduino based tiny computer that is capable of driving a led display this is a great little project to delve into.

I chose this HAT from Allo to support my ventures. (I’m not receiving any commission if you click on these links, it’s purely for information and your entertainment). It’s inexpensive and you won’t have any tangling wires around. If your GPIO pins are free this is a good way to make use of them.
HAT? Hardware Attached on Top.
Just plug it in,

and grab the drivers from their website and you’re good to go.
When I say drivers, I mean a python library from here. This is an abstraction on top of the Adafruit Neopixel library for leds using WS2811 chips. You get a bunch of example python scripts to try out the possibilities.
I made 2 versions of this project as I solved the challenges along the way. A command line version and a python Flask web app.
The quick and dirty version – SSH tunnel #
The aim was to be able to control – start and stop – the lights, from my laptop, while not keeping a terminal session open to the PI. In case you’d ssh into the PI and execute the script and lose the terminal session, then you’d need to find the process id of the the script and kill it, just to turn off the led lights. This involves a little more effort than what I was willing to invest in this before and after a meeting.
So I figured, why not start an ssh session, pass in the script to python to execute, make the script to print the process id print(os.getpid()) to stdout and capture that by diverting it into a file on my laptop and put the process in the background, like this:
// start.sh
ssh -i ~/.ssh/id_rsa_rpi  pi@pi sudo python3 -u  < my_pic.py > "my.pid" &
Normally you’d stop the python script with a keyboard interrupt (ctrl+c). Since I have the process id of the python script, to stop it, I’d, once again ssh into the PI and kill the process with a SIGINT signal.
// stop.sh
tail -1 my.pid | xargs ssh  -i ~/.ssh/id_rsa_rpi  pi@pi sudo kill -SIGINT
So with this approach, when the important meeting starts just execute the ./start.sh, the LEDs light up, and when done the ./stop.sh turns off the LED lights.
It’s not too bad, but can we make it any better?

User Friendly version - web app #
Yes, Create a web app. Since the home-hub project, I already had a python Flask web app up and running, the WSGI Gunicorn, Supervisor, NGINX machinery already in place, just add another app to these and good to go, right? Well.. there were some challenges along the way as always.
Celery tasks - a first failed approach #
So I created another Python Flask app, a simple one really, a page with 2 buttons simple.

I know, I know, I could have made just one button, but hey, that’s the freedom of creativity.
Adding libraries to your python project #
The first obvious challenge was, how to get the Rainbowhat libraries into my project. I’m using pip. The libs were installed with
sudo python setup.py install
from source code, so how to get this into my pipenv site-packages to make my project compile? The library would only run on a PI, because of obvious hardware requirements. So I added the following to my Pipfile
[packages]
rpi-ws281x = {editable = true, path = "./library/rpi-ws281x"}
rainbowhat = {editable = true, path = "./library/RainbowHat"}
This allows to add and install a path as an editable dependency, more on this here. After running a pipenv install I could import the libs in my code and start to use them.
Now that I have the libs installed in the correct python environment, I thought I need something async, non blocking as this is a web app and something that can handle long running non-scheduled tasks so after some research I figured why not set up celery, a distributed task queue.
To facilitate communication between client and workers celery requires a broker, this can be Amazon SQS, Redis or RabbitMQ. I chose RabbitMQ because it’s really easy to get it up and running in a docker container on the PI.
Getting Celery up and running was a breeze, just followed their pretty good docs, created a celery instance in my flask app, annotated a method with @celery_app.task annotation (or whatever you name your Celery instance)
from celery import Celery

celery_app = Celery('tasks', broker='pyamqp://guest@localhost//')

@celery_app.task
def run_graphics():
    print("Hello World")
and started the celery worker that looks like this, where rainbowhat_app.celery_app refers to the location where I defined the celery instance:
pipenv run celery -A rainbowhat_app.celery_app worker
To prove this idea works I hooked up my On and Off buttons to a celery task, which was just a dummy print(“Hello World”), and hey presto, when I pressed the On button, that calledrun_graphics.delay()
and I saw the messages firing up in RabbitMQ, and the “Hello world” appeared in the console where I ran the celery worker from as it relays everything sent to STDIN, STDERR.
To stop it, the delay() returns the celery AsyncResult task which can be used to keep track of the task execution state, I could call:
task.revoke(terminate=True, signal='SIGINT')
This would stop the task, job done, I thought, but not just yet.
There was one tiny detail that I overlooked at first, and that is, – as the library docs are emphasising – the process has to be run as root.
So when I hooked up my celery task with the actual script with the graphics, it would throw an error, so I had to look for other solutions.
Celery task running a command, the second failed approach #
The way my thinking went, the next thing to try was to find out how to run something as sudo. I already knew that sudo python3 <my_script>.py worked just fine, so how to do this from a celery task running from a flask app.
At this point I learned about subprocess.Popen(), the official docs were a bit too much to understand first, then I’ve found this article which helped a lot to get the concept and showed the difference between the available methods and taught some history too.
All worked fine, it seemed, I could start the task. The task was executing the python script in the sudo python3 my_script.py way. The leds lit up. I was chuffed.
And when I pressed Off, nothing happened.
The app is running as a pi user, and the task spawned a subprocess running a command as root, so celery had no permission to kill the command, but it killed the task, so I was left with a running sudo process and a killed task.
And there was another issue, apparently with how sudo behaves.
sudodoes not forward signals sent by a process in the command’s process group since 28 May 2014 commit released insudo 1.8.11.
So this meant even if I solve the permission issue somehow the -SIGINT signal would never reach the python script, which result in an unclean exit of the program where the program quits but last lit LED stay turned on, so no good.
Python Subprocess – the final version #
Then it struck me, why am I using Celery at all, subprocess satisfies all my requirements, it’s “async”, non-blocking (if I don’t want to communicate with the subprocess). I can just keep track of the process id (pid) and terminate it when I want to turn off the LEDs.
To solve the sudo behaviour I had to pass
preexec_fn=os.setpgrp
to subprocess.Popen() so the subprocess would be created in its own process group and not as a child of the flask app.
From this point I got the group process id: gpid = os.getpgid(child.pid)
and :
sudo kill -SIGINT gpid
did the magic.
Future improvements #
How nice would it be to automate the lights even more. Why not connect it with my Google Calendar? Via IFTTT trigger an AWS Lambda to post a message to an SQS message queue and long poll this queue from the PI. How about adding slack integration to the IFTTT.
I’ll consider using a light diffuser to soften the bright LED lights
Conclusion #
I hope you’ve enjoyed the thought process and the evolution of this little idea growing from a command line inconvenience to a working web app. I’ve learnt a lot about Pipenv and how the python packaging and package distribution works. I have a better understanding of linux processes and it was a good fun to create visuals on this 8 x 8 LED display.